
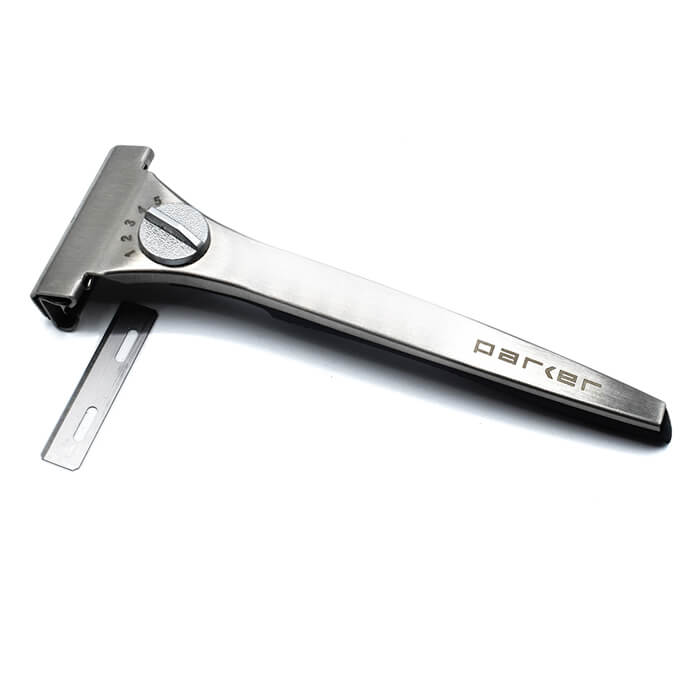
Parker safety razor injector adjustable
49,00 € ex. VAT
Out of stock
Would you like to be notified when this product is back in stock?
You may also like…
Parker Safety Razor Injector Adjustable
Parker’s Adjustable Injector Razor is precision engineered design to provide you with a smooth and irritation free shave. Our single blade razor provides a close and comfortable shave with fewer ingrown hairs and razor bumps when compared to multi blade cartridge razors since they cut the hair directly at the surface. With Parker’s adjustable design, it’s easy to customize your shave by simply turning the knob on the top of the razor. For the mildest shave, adjust the safety bar to a setting 1 which has a minimal blade gap. For a moderately aggressive shave, adjust to a setting 5 for the maximum blade gap (or try somewhere in between).
Injector razors have a blade loading system which is simple once you get the hang of it. You will be rewarded with a remarkably close and comfortable shave thanks to our single blade, adjustable design.
*Comes loaded with one Parker Injector Blade – please use caution when unboxing*
- Razor type: Adjustable Injector Razor
- Blade Type: Standard Injector Style Razor Blades – loaded with one new blade
- Weight: 1.24 oz./35g
- Length: 4.96 in./126mm
- Handle material: Stainless Steel & with Ridged Plastic Grip
*If you’re looking for a protective travel case for this razor, our Parker LP3 Saddle Brown Leather Case will fit the bill.
For the best shave experience, follow these basic tips:
- Prepare your skin for shaving – a great time to shave is after a hot shower.
- Use a quality shave soap or cream to lubricate and protect your skin from the blade, lessening irritation. Ideally, use a shave brush to lift the facial hair and more evenly dispense the lather.
- Let the razor do the work – apply little pressure when shaving with our injector razor, as the blades are quite sharp. Be mindful to take it slowly and use a shallow angle, such as 10-15 degrees.
- The top of the head should lay flat against your skin with this shallow angle. Shave with the grain for more sensitive skin types. If you’re looking for the closest shave, shave against the grain on your second pass, with a fresh lather applied for extra protection.
- The amount of time each blade will last varies from individual to individual, however the average is approximately 3-7+ uses out of each blade. Once shaving starts to feel rough and the blade drags over your skin, it is time to change the blade.
- Experiment with the razor until you achieve your most comfortable shave – enjoy the moment!
Instructions for Loading the Blade:
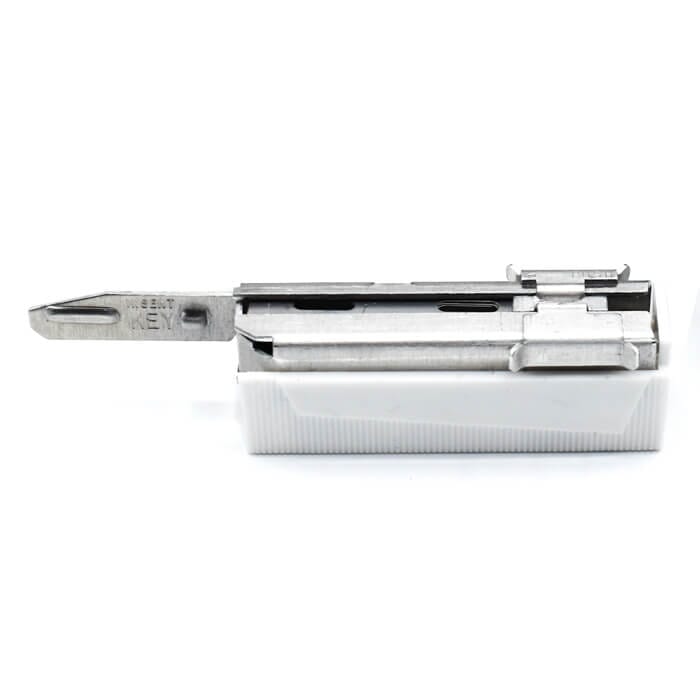
- The blade case/holder is called the “Injector” and the sliding tab on top is called the “Blade Loader”. The part that goes into the razor to load the blade is called the “Stem” or “Insert Key”.
- Hold the razor by the handle with the head up with one hand and insert the “insert key” into the razor’s slot opening on the rear of the razor head with your other hand as far as it will go using mild force.
- Slide the blade loader forward all the way to insert a new blade into the razor. At the same time, this will push the old blade out of the razor.
- Pull out the injector from the razor after you have inserted the new blade.
- Discard the old blade in the used blade section on the bottom of the blade case.
- Make sure that the new blade is centered and resting against the two small blade stops. If it is not, the razor will not work properly.
- Start shaving with the adjustment knob at a lower setting, using a shallow angle with minimal pressure.
- Once you get the hang of it, start experimenting with dialing different settings (#1 is the mildest suitable for more sensitive skin & #5 is the most aggressive, providing the closest shave). Find the level of aggression that works best for you for the most comfortable shave.
Tightening a safety razor correctly does not mean cranking it down hard until you damage the threads. Proper tightening usually involves a small final turn once you’ve reached the stop. In addition, to preserve the handle’s threading, it’s recommended to always join the head and handle while keeping them perfectly straight and aligned.
A well-maintained safety razor lasts a long time and stays looking good, which is why cleaning after every use is an essential step. Daily maintenance doesn’t require complicated procedures: after shaving, rinse thoroughly with warm water and a mild cleanser (such as hand soap or shampoo), then dry each part carefully.
We also recommend not leaving the blade installed and dirty in the razor. If it stays damp and covered with residue, the blade can start micro-oxidation; over time these marks can transfer or leave stains on the razor as well, worsening the appearance of the finish.
Special attention for zamak razors: with this material it’s important to disassemble, rinse, and dry every single component after use. In particular, the top cap thread is an area where water and residue can easily build up: if neglected, over time this can trigger corrosion and wear, eventually weakening the thread and compromising functionality.
To protect materials and finishes, avoid any “extreme” methods: do not boil the razor, do not put it in the dishwasher, and do not use harsh products or aggressive procedures. Even on high-quality razors, these practices can damage chrome plating, anodizing, and other coatings.
Do you have a brass razor and want to restore its shine? A simple remedy is to soak the components in a bowl with lemon juice for about 10–15 minutes. Then rinse and dry with a soft, scratch-free cloth for a clean, bright finish.
| Weight | 55 g |
|---|---|
| Dimensions | 5 × 13,5 × 3 cm |
| Brand | Parker |
| Razor Type | Injector |
| Shaving Frequency | Every other day |
| Razor Aggressiveness | Adjustable |


